Odd’s are this article will be applicable to approximately 0 readers of my blog, but hopefully Google will catch it and someone else may find it helpful in the future. Here is the situation, CMU has access to a wide variety of online information sources through the library, unfortunately these require you to be on campus, or using a CMU IP address in order to utilize them. For windows users there is the VPN solution, but what about linux users? Hopefully this will document how I got it to work. No guarantees for anyone else.
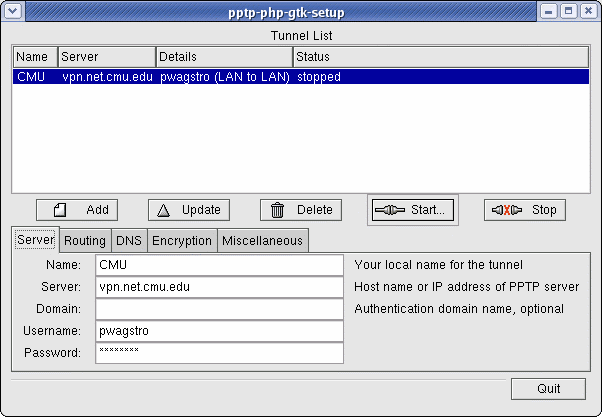
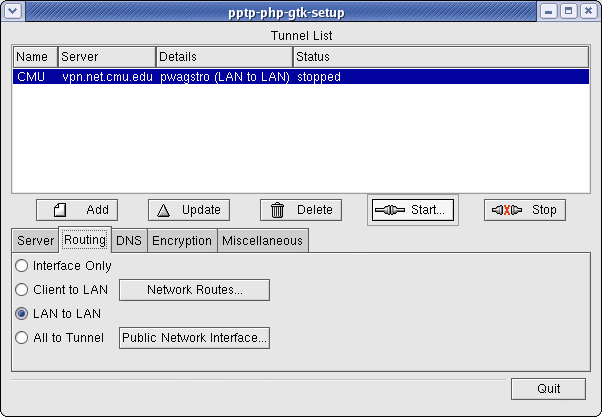
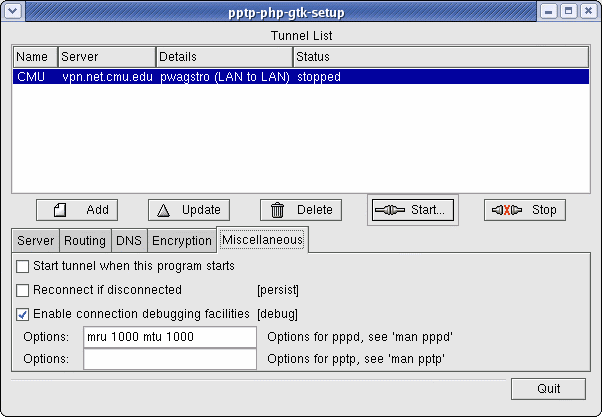
The first step is to go an install all the PPTP Client stuff for Linux. I’m assuming that you’re bright and that you know how to do that. There are reasonably good documents for it on their site. I didn’t have much trouble getting it to work under Fedora core 1. Now, after you’ve installed everything you’ll want to create the connection setup. The easiest way to do this is using the GUI, so I’ll walk you through how to do that. First start up pptpconfig. You’ll want to create a new connection with the settings shown in the following screenshots. (The tabs not shown should remain all blank)


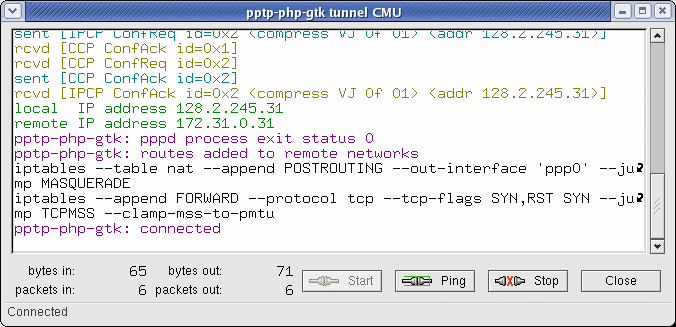
Now make sure you save your connection. Then press the start button and a window should pop up with all sorts of fun information. Here is what mine looks like right after I start my connection.

Try clicking the ping button and making sure that you can ping the other end of your connection. If you’ve gotten this far, then you’re in great shape. But you can’t really do much yet. Stop the connection and exit the program. Now, you probably don’t want to have to start up that ugly GUI all the time. Also, you want to be able to access some resources right? Luckily I wrote a script that does just that. Grab a copy of cmuvpn.sh and save it to your disk. Then the top line contains a list of sites that you’ll want to connect to. Add them in seperated by spaces. This will add in the entire subnet of the site into your the routing. Only these sites will be routed over the VPN. Now comes the time for the moment of truth. As root run cmuvpn.sh start and it should wait a few seconds and then return without any message. Try going to http://ieeexplore.ieee.org/ and seeing if you can do searches. If you can, you’re in business. If you can’t well, keep searching. When you’re done run cmuvpn.sh stop.
I decided to be even lazier because I don’t like having to type sudo all the time and bringing up and down the interfaces to the network isn’t anything that big as I don’t have any other user accounts on my laptop. So I added some lines to my .bashrc that alias a few commands:
alias ifdown="sudo /sbin/ifdown"
alias ifup="sudo /sbin/ifup"
alias vpn="sudo /home/patrick/scripts/cmuvpn.sh"
switch() { sudo redhat-config-network-cmd --profile $1 --activate }
I then entered a few more lines into my /etc/sudoers to allow me to do this stuff without a password.
# Cmnd alias specification
Cmnd_Alias IFCMDS = /usr/bin/redhat-config-network, \
                    /usr/bin/redhat-config-network-cmd, \
                    /sbin/ifup, /sbin/ifdown, \
                    /home/patrick/scripts/cmuvpn.sh

[...SNIP...]

# User privilege specification
root    ALL=(ALL) ALL
patrick ALL=(ALL) NOPASSWD: IFCMDS
This probably isn’t the safest thing to do, but it does allow me to type vpn start and vpn stop to start up and shut down the VPN. It also makes it easy to work with the other interfaces too. I’ve got the different networking profiles setup through the redhat network config tool, because my home 802.11 network uses encryption and the CMU network does not. Now I can type switch home or switch cmu when I get to the new location and I’m ready to go. Handy for a laptop.